
Transparent PNG sheets
Export a combined sprite sheet for each character move set, with clean alpha and frame alignment that Unity can slice.
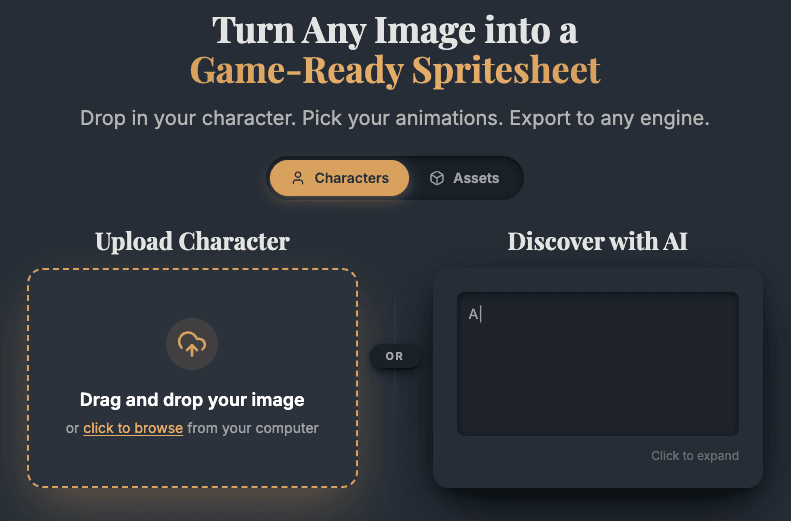
Generate animated 2D sprite sheets for Unity from a prompt or character image. Export PNG + JSON, then slice and animate in Unity faster.
Prefer working inside Unity?
Use the AutoSprite Unity Extension to import PNG + JSON exports, slice frames, and prepare AnimationClips in the editor.
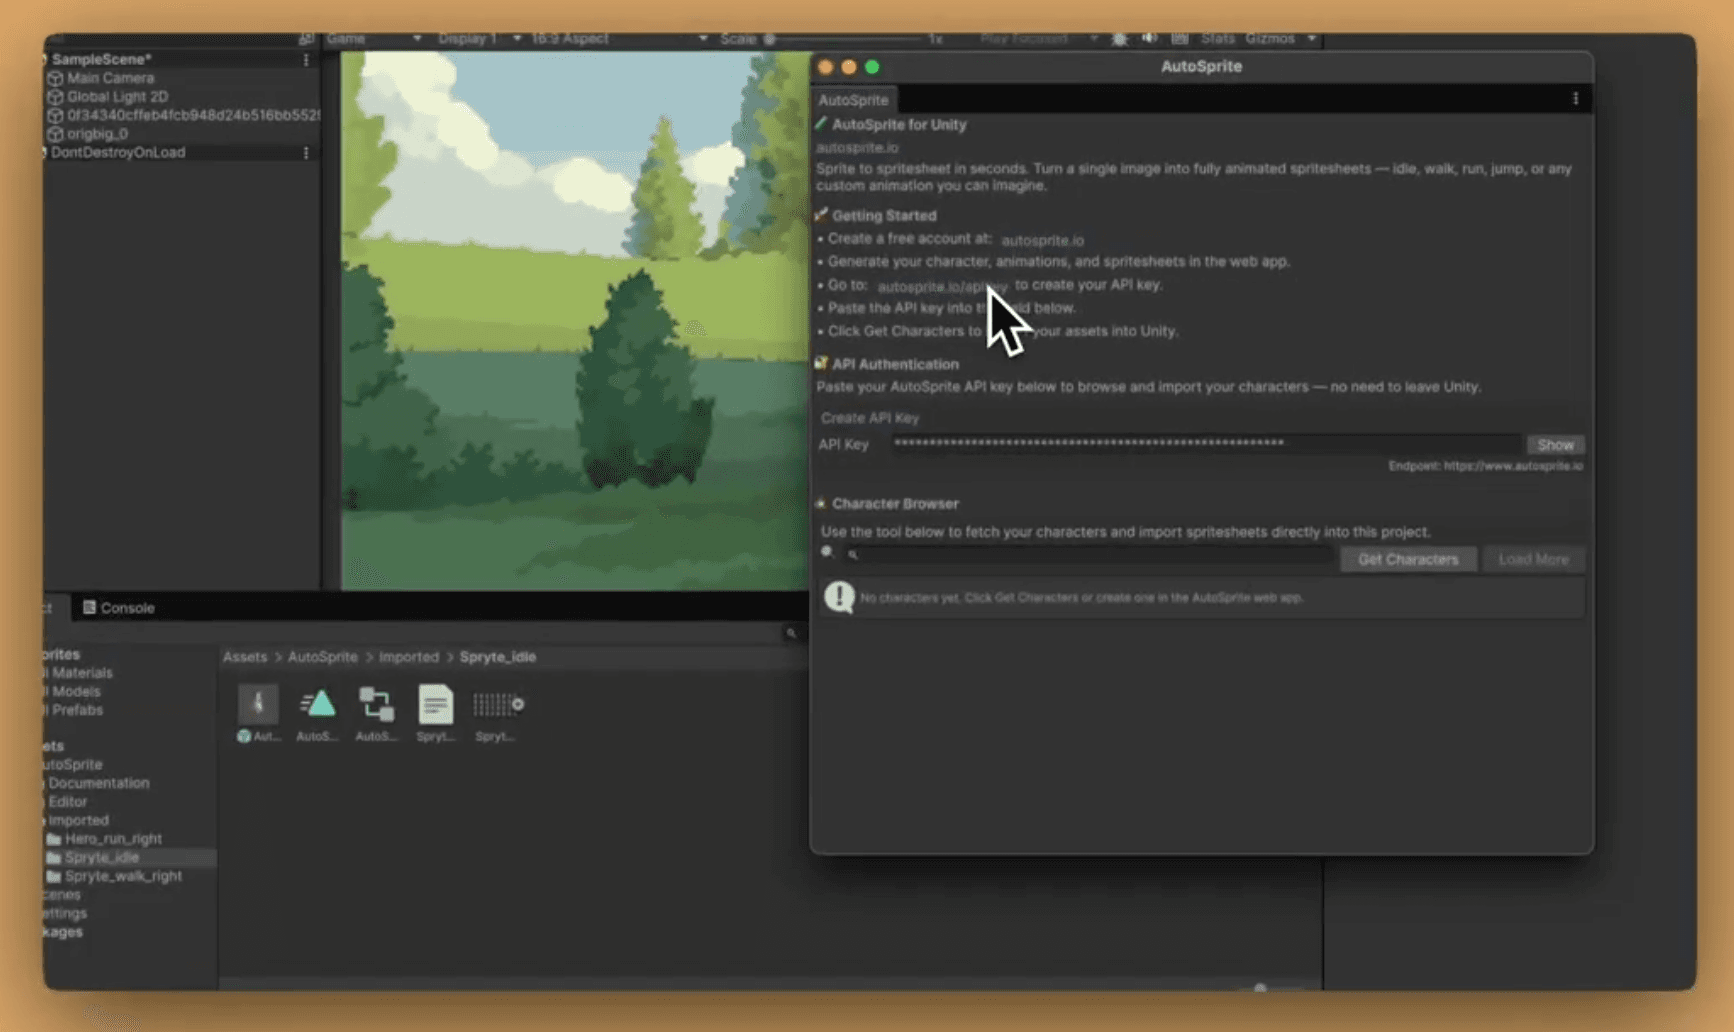
AutoSprite Unity Extension
Unity import
PNG + JSON to sliced frames
Output fit
Unity can import many images. A production-ready sprite sheet needs more structure.
Unity needs
AutoSprite gives
Export a combined sprite sheet for each character move set, with clean alpha and frame alignment that Unity can slice.
Keep frame coordinates beside the image export so your team can preserve timing, names, and source frame references.
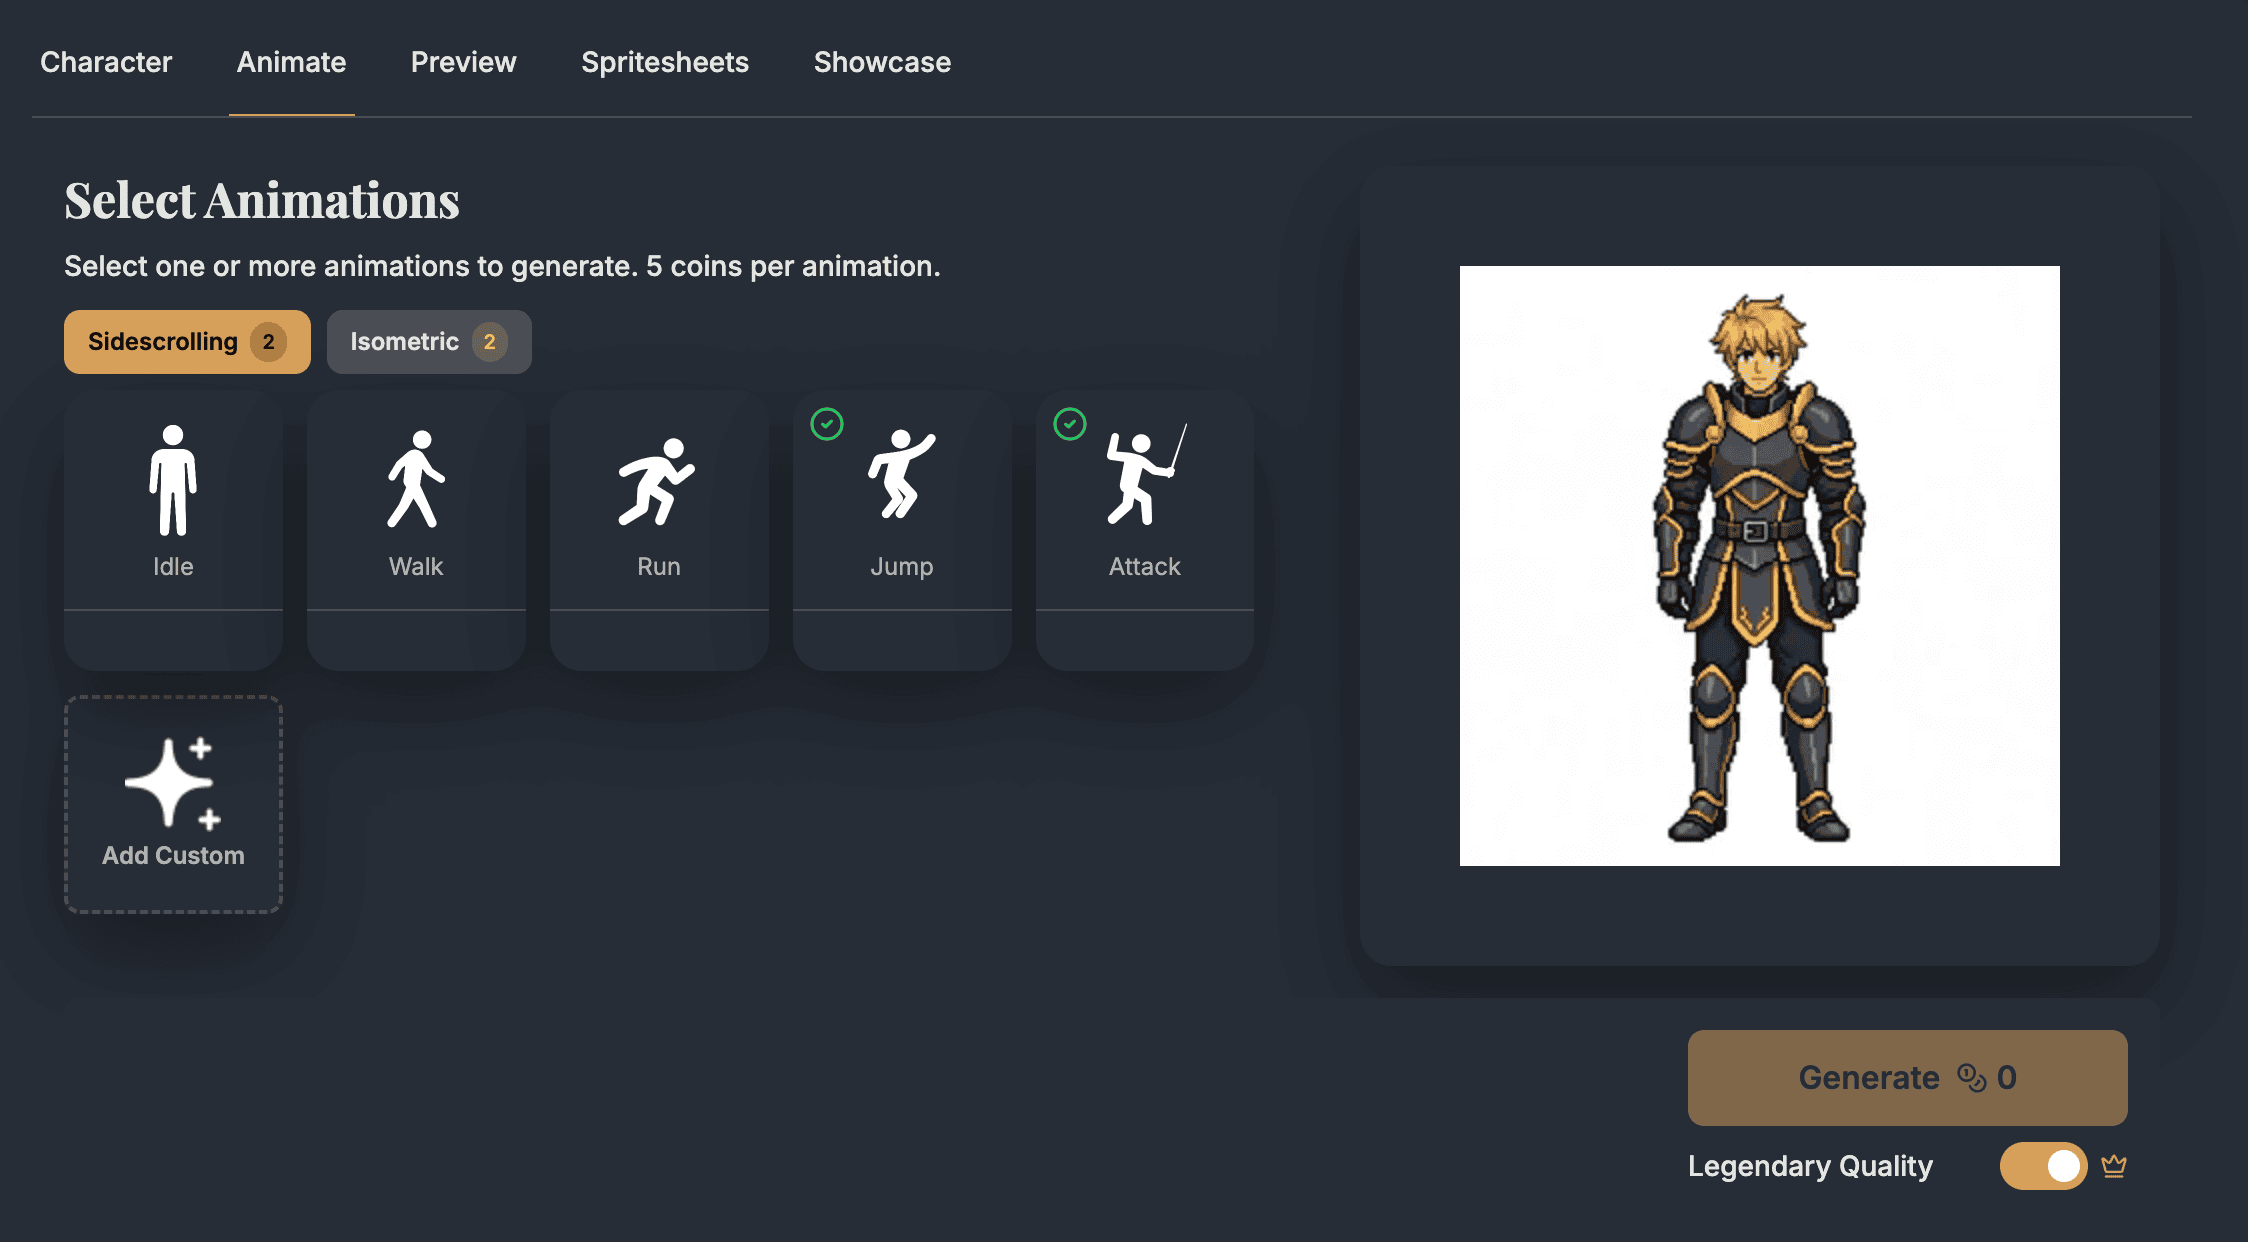
Generate idle, walk, run, attack, jump, hit, or custom actions as separate sheet outputs instead of hand-building every pose.
Start from a prompt or single image and keep the same character identity across the animations you plan to import.
PNG sprite sheet
Visual frames
Import as Sprite (2D and UI), then slice in Sprite Editor.
JSON atlas data
Frame coordinates
Keep frame size, position, naming, and source-frame context beside the texture.
Download bundle
Sheet + atlas files
Export multiple completed sprite sheets together when you are moving a character set into Unity.
Actual workflow
AutoSprite feeds Unity faster without replacing your Unity animation workflow.
Start from a character brief or existing concept art.
Generate consistent frames for the moves you selected in AutoSprite.
Import as Multiple sprites and slice in Unity's Sprite Editor.
Build AnimationClips and connect them to your controller states.
Give AutoSprite the character brief before you think about Unity import settings.
Pick moves that map cleanly to the states you plan to wire in the Animator.
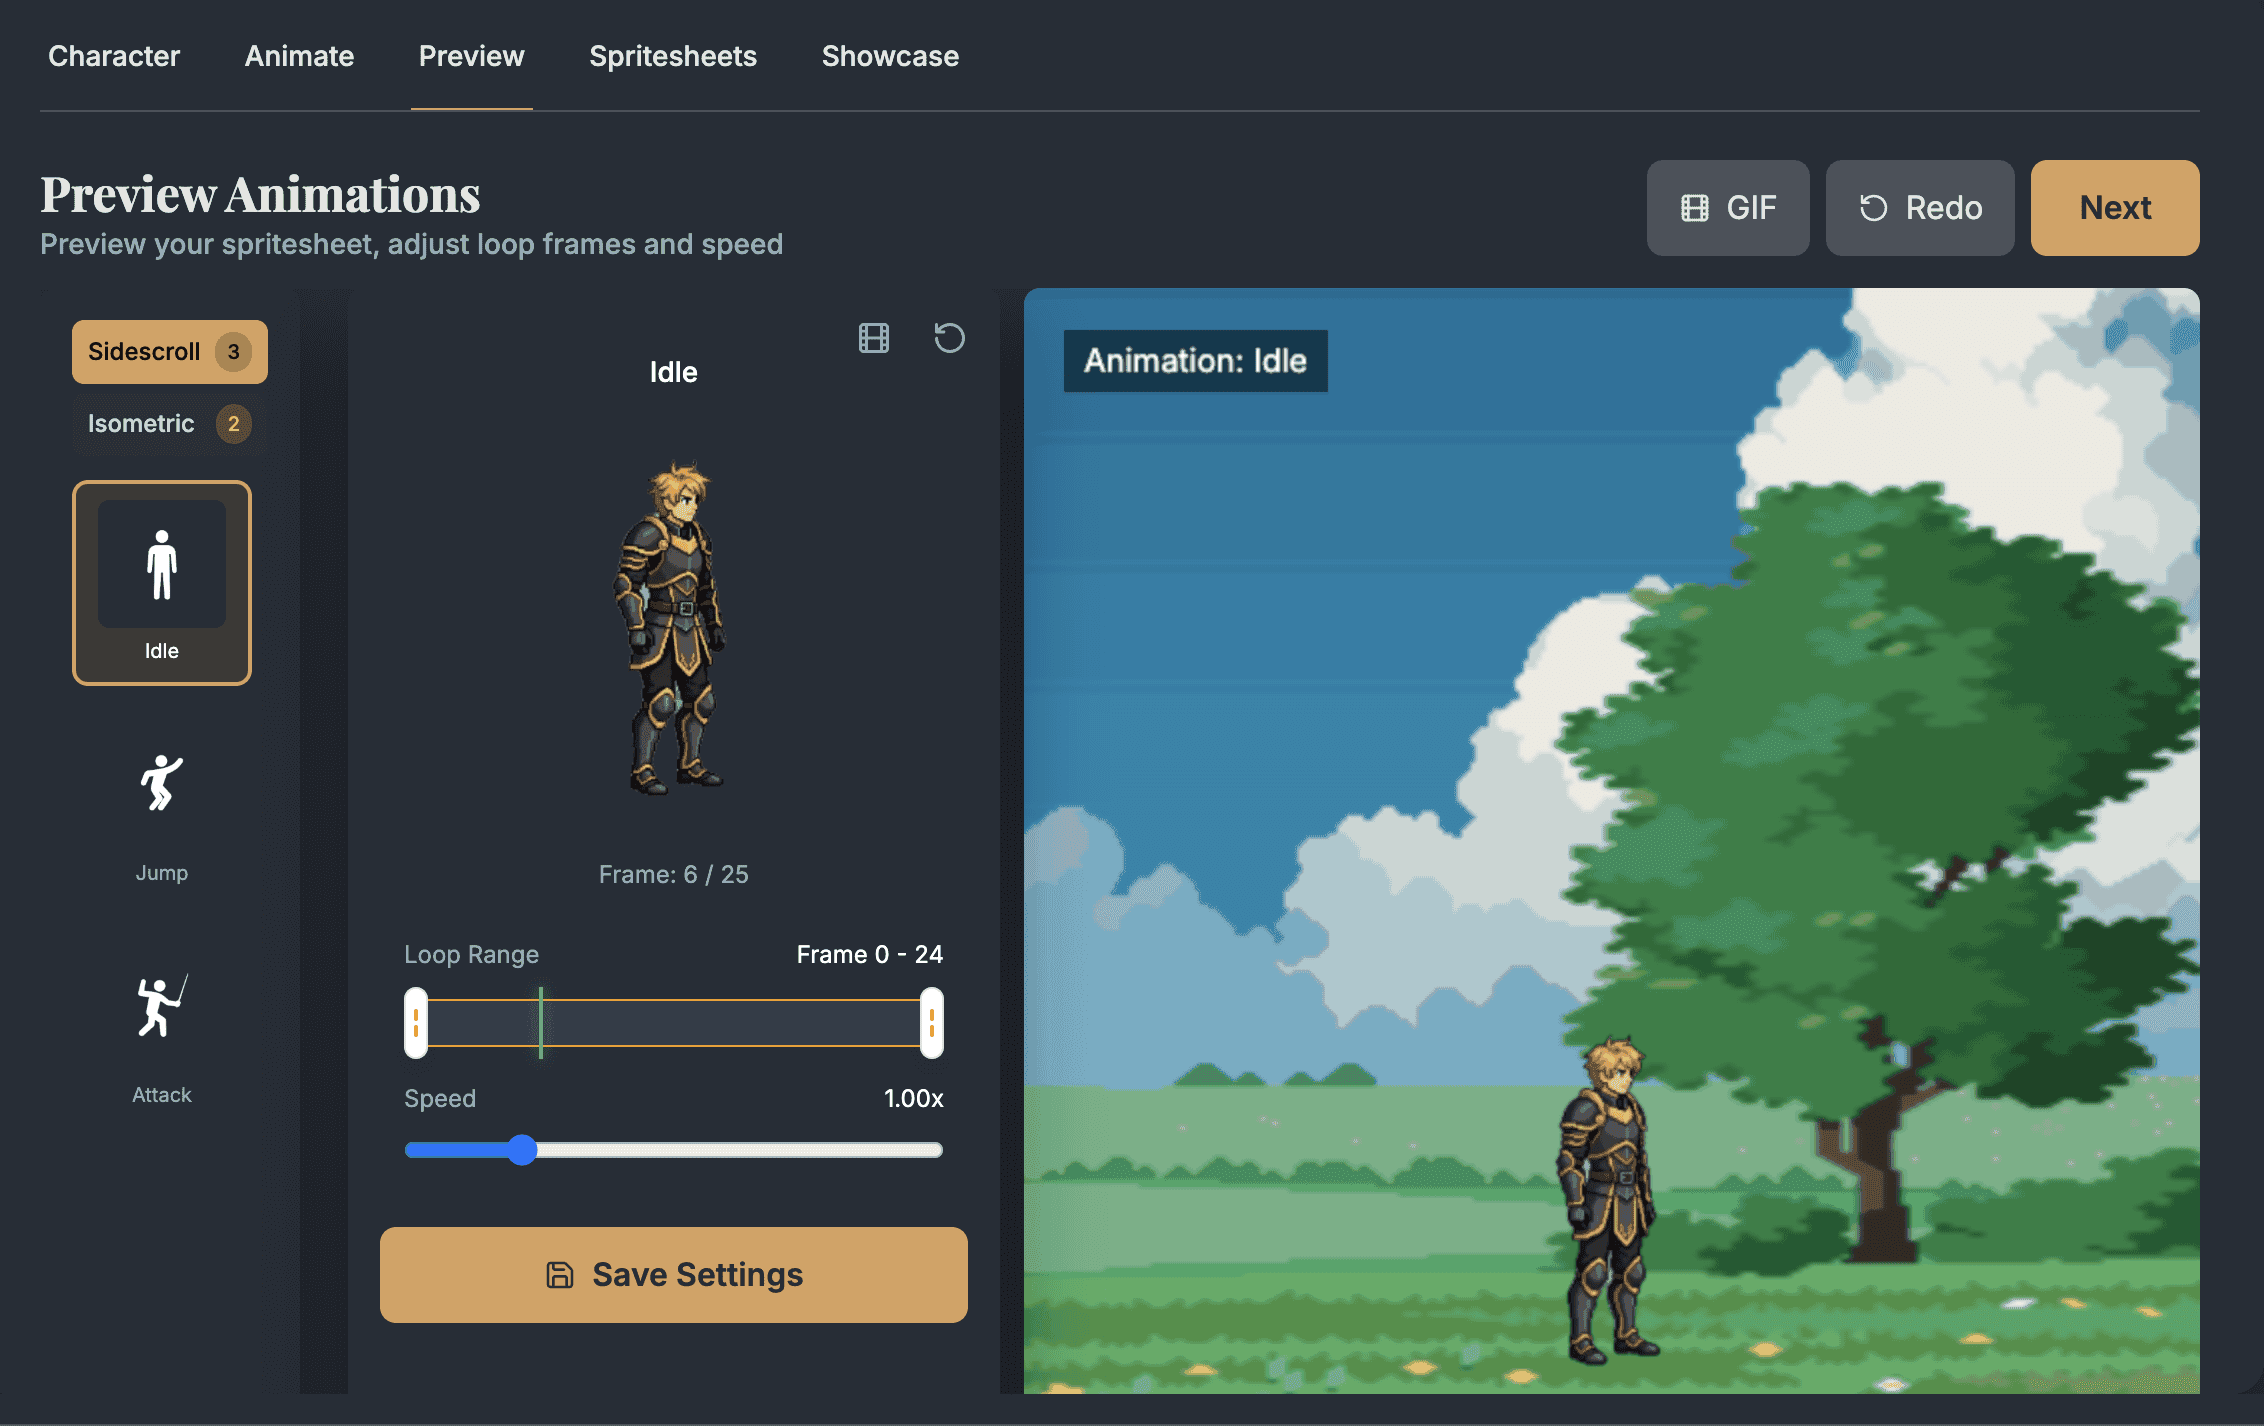
Use the preview pass to catch animation issues before the art enters your Unity repo.
Download the PNG sheet and JSON data, then choose the import path that fits your project.
Place the files under Assets, set Sprite Mode to Multiple, slice frames, then create AnimationClips for each move.
Unity manual integration docsImport local files or connect with your API key, then let the extension slice exports and prepare clips inside Unity.
Unity Extension docs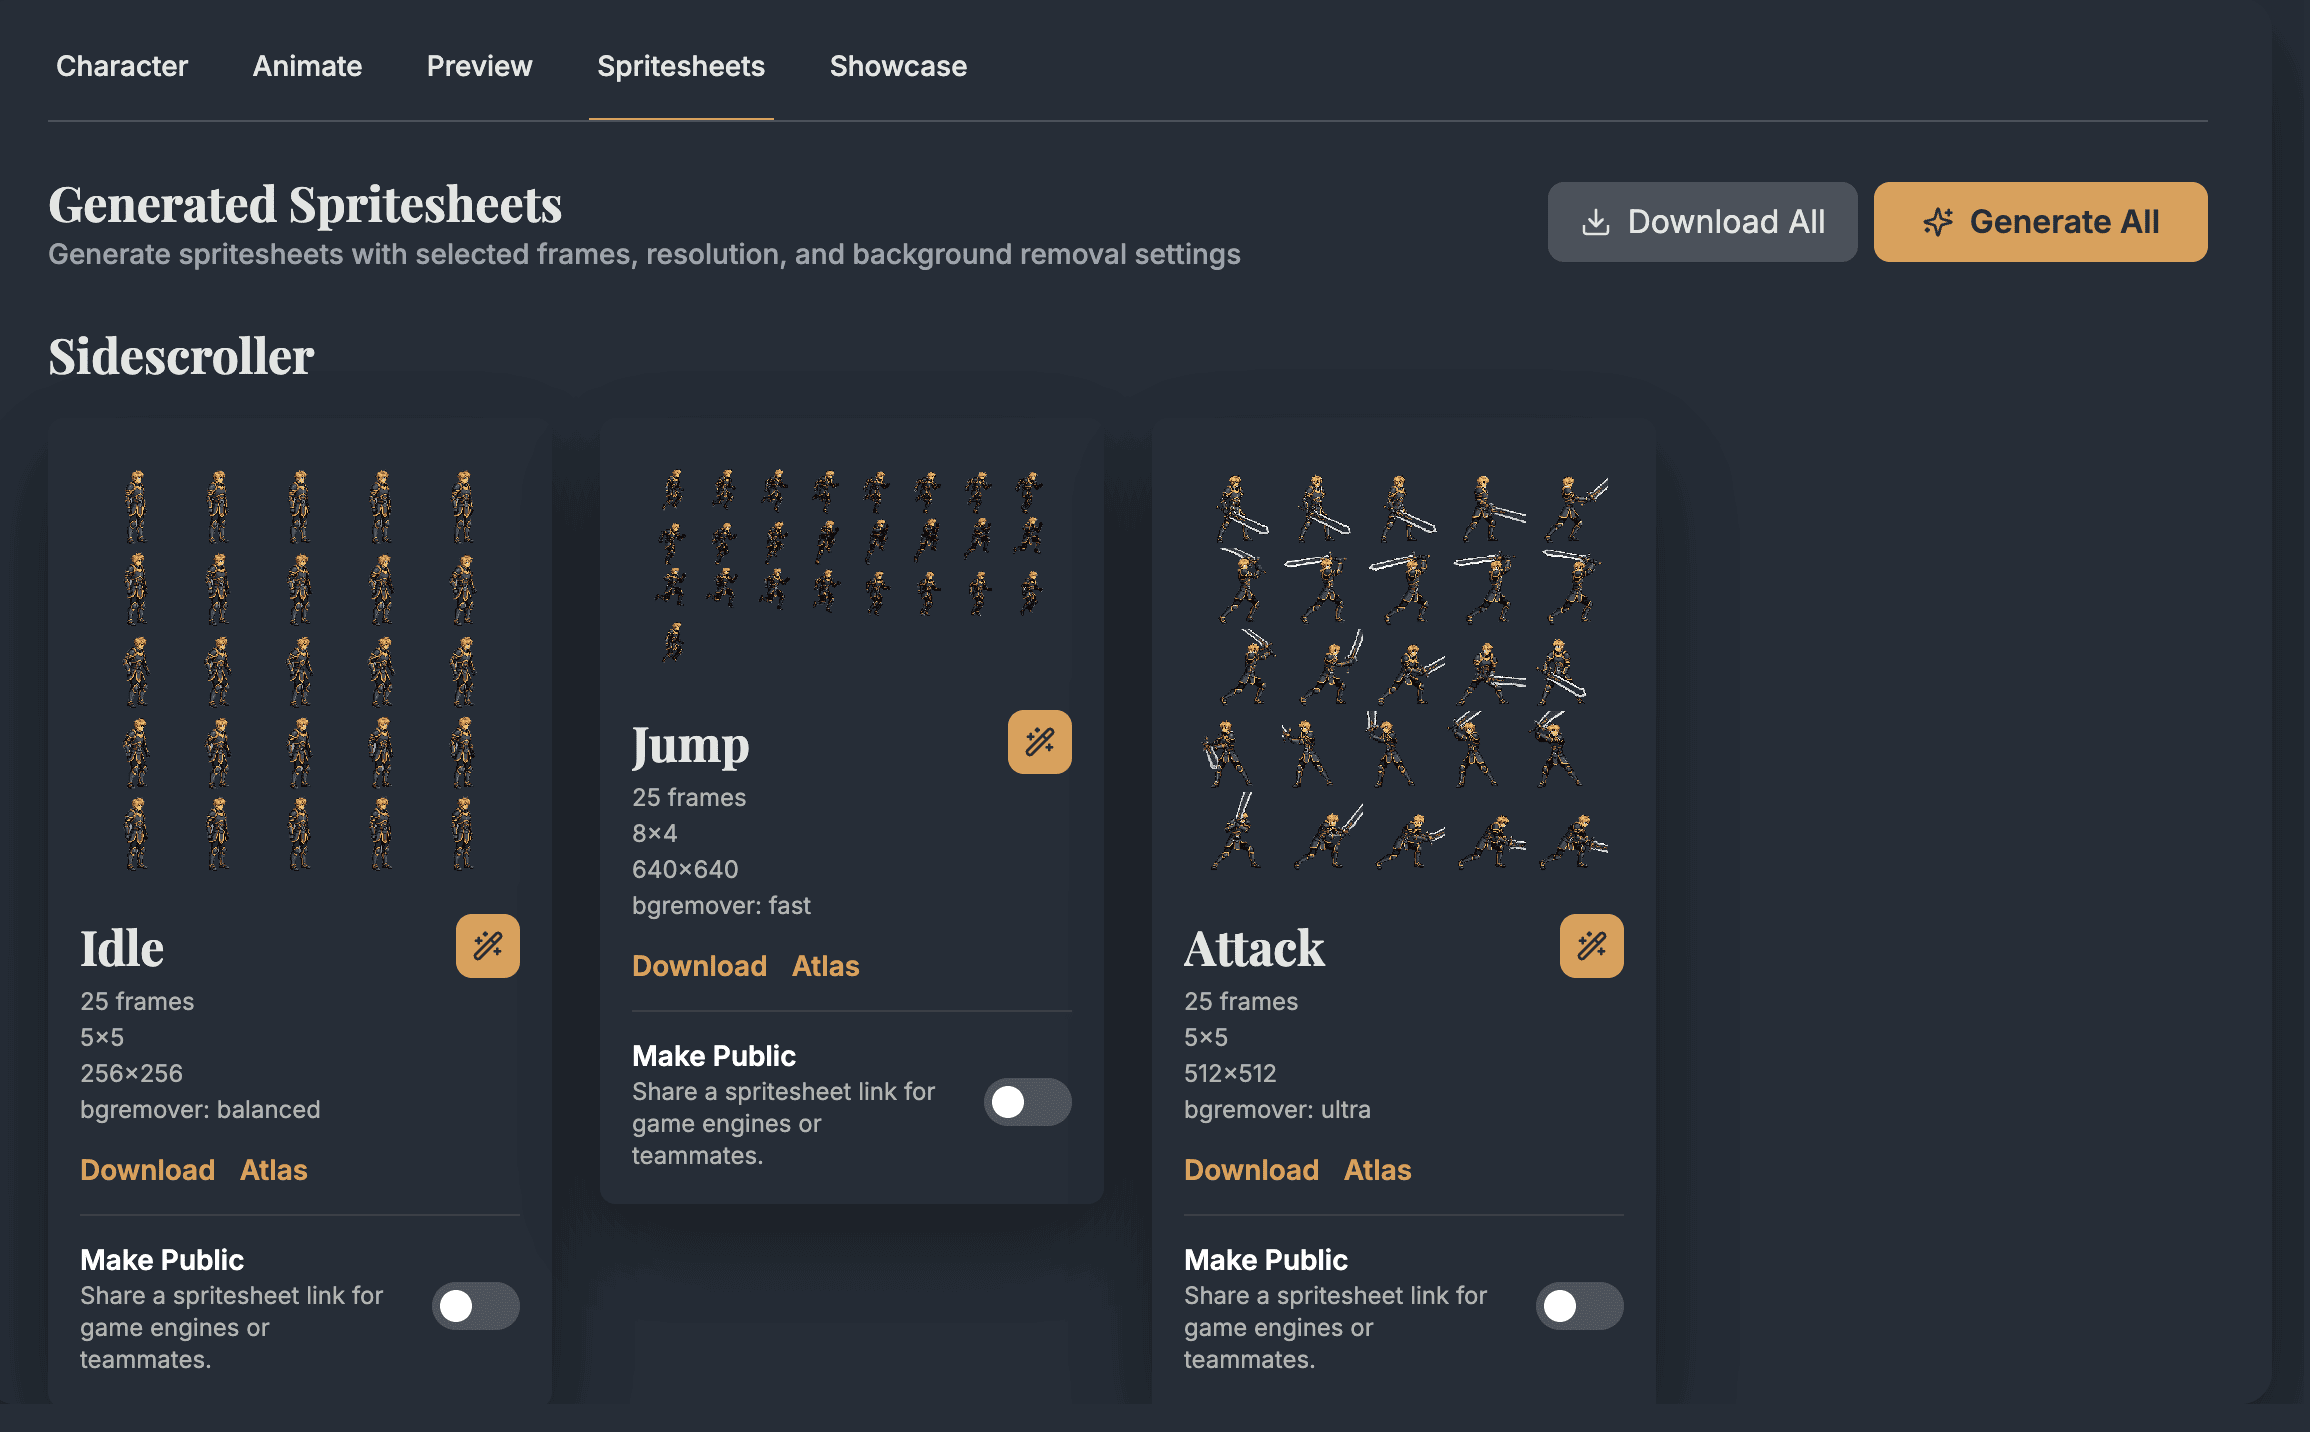
Unity import
A clean export still needs consistent Unity texture settings.
Texture Type
Sprite (2D and UI)
Tells Unity to treat the PNG as a 2D sprite texture.
Sprite Mode
Multiple
Allows Unity to slice the sheet into individual frame sprites.
Pixels Per Unit
Match your project scale
Common values are 16, 32, 64, or 100 depending on camera and tile scale.
Filter Mode
Point (no filter) for pixel art, Bilinear for painted art
Keeps pixel art crisp or lets high-res art smooth between pixels.
Compression
None or High Quality
None is the only fully artifact-free choice for pixel art; High Quality works for painted sprites.
Mesh Type
Full Rect for rectangular sprite bounds
Useful when transparent padding and consistent frame bounds matter across animation frames.
Import guardrails
Most sprite-sheet problems show up as small import mismatches.
Set Sprite Mode to Multiple before slicing, otherwise Unity treats the sheet like one large image instead of frame sprites.
Keep PPU consistent across idle, walk, run, and attack sheets so the character does not resize between AnimationClips.
Use Point filtering for crisp pixel art and Bilinear filtering for smoother painted or higher-resolution sprites.
Use None or High Quality compression for small characters where transparent edges and frame readability matter.
Export the moves your controller expects before wiring transitions, so missing art does not block playtesting.
Workflow decision
Use AutoSprite where it accelerates animation coverage, then let Unity own import settings, clips, controllers, and gameplay behavior.
Use AutoSprite when
Use this workflow when a Unity 2D prototype needs idle, walk, run, jump, attack, or hit frames before final art is ready.
Use manual import when
Manual PNG + JSON import is the best fit when one character needs careful Sprite Mode, slicing, pivot, PPU, and compression review.
Use the Unity Extension when
The extension makes more sense when repeated slicing, AnimationClip creation, and AnimatorController setup are slowing the team down.
Keep in Unity when
AutoSprite supplies frames. Unity should still own Animator transitions, colliders, events, prefabs, sorting layers, and runtime behavior.
Pipeline fit
Use generated idle, walk, run, jump, and attack loops while you tune movement, hit timing, enemy behavior, and camera feel.
AutoSprite supplies the frames. Unity still owns controllers, transitions, colliders, events, prefabs, materials, sorting layers, and runtime optimization.
Small projects can export manually. Teams moving many characters can use the Unity Extension to reduce repetitive slicing and clip setup.
Once the sprites are in Unity, you can still use your normal atlas packing, Addressables groups, source control, and review workflow.
Animator handoff
After Unity slices the sheet, the frames can be dragged into a clip manually or created with an editor utility.
using System;
using UnityEditor;
using UnityEditor.Animations;
using UnityEngine;

public static class AutoSpriteClipBuilder
{
    [MenuItem("AutoSprite/Create Idle Clip")]
    public static void CreateIdleClip()
    {
        var path = "Assets/Sprites/hero_idle.png";
        var frames = AssetDatabase.LoadAllAssetRepresentationsAtPath(path);
        // Sort by trailing frame number so hero_idle_2 comes before hero_idle_10.
        Array.Sort(frames, (a, b) => FrameIndex(a.name).CompareTo(FrameIndex(b.name)));

        var clip = new AnimationClip { frameRate = 12 };
        var clipSettings = AnimationUtility.GetAnimationClipSettings(clip);
        clipSettings.loopTime = true;
        AnimationUtility.SetAnimationClipSettings(clip, clipSettings);
        var binding = new EditorCurveBinding
        {
            type = typeof(SpriteRenderer),
            path = "",
            propertyName = "m_Sprite"
        };

        var keys = new ObjectReferenceKeyframe[frames.Length];
        for (var i = 0; i < frames.Length; i++)
        {
            keys[i] = new ObjectReferenceKeyframe
            {
                time = i / clip.frameRate,
                value = frames[i]
            };
        }

        AnimationUtility.SetObjectReferenceCurve(clip, binding, keys);
        if (!AssetDatabase.IsValidFolder("Assets/Animations"))
            AssetDatabase.CreateFolder("Assets", "Animations");
        AssetDatabase.CreateAsset(clip, "Assets/Animations/hero_idle.anim");
        AnimatorController.CreateAnimatorControllerAtPathWithClip(
            "Assets/Animations/Hero.controller",
            clip
        );
    }

    private static int FrameIndex(string name)
    {
        var index = name.LastIndexOf('_');
        return int.TryParse(name.Substring(index + 1), out var n) ? n : 0;
    }
}
Unity Extension preview
Unity use cases
AutoSprite helps most when missing character motion is blocking playtesting.
Build a first movement set quickly: idle, walk, run, jump, attack, and hit reactions. This is ideal before you commission or polish final art.
Generate readable side-view or top-down characters for combat tests, village scenes, arena waves, and boss experiments.
Export the exact loops that match your controller states so a prototype does not stall on missing art for basic transitions.
FAQ
These are the practical questions developers usually ask before they try the workflow in a real Unity project.
Yes. AutoSprite exports transparent PNG sprite sheets and JSON atlas data for Unity 2D projects. Import the PNG as Sprite (2D and UI), set Sprite Mode to Multiple, slice the frames in Unity's Sprite Editor, then create AnimationClips for the Animator.
For a normal Unity 2D workflow, export the PNG sprite sheet and the JSON metadata. The PNG becomes the texture Unity slices into sprites, while the JSON preserves frame coordinates, names, and source-frame context for your team or tooling.
No. You can use the manual PNG workflow in any Unity project. The Unity Extension is helpful when you want AutoSprite inside the Unity Editor and prefer automatic slicing, AnimationClip creation, and AnimatorController setup.
Set Texture Type to Sprite (2D and UI), Sprite Mode to Multiple, choose a Pixels Per Unit value that matches your camera and tile scale, and use Point filtering for pixel art or Bilinear filtering for smoother painted art.
AutoSprite is built for game production workflows, including commercial prototypes and shipped Unity projects. Check your plan terms for usage limits, team needs, and export volume before moving a large character set into production.
Yes. AutoSprite can generate pixel-style characters, and those exports work well with Unity when you use Point filtering, consistent Pixels Per Unit settings, and compression settings that protect crisp transparent edges.
Start with a prompt or a character image, choose the Unity animation loops you need, and export the PNG sheet when the motion is ready to test.
AutoSprite is not sponsored by or affiliated with Unity Technologies or its affiliates. Unity is a trademark or registered trademark of Unity Technologies or its affiliates in the U.S. and elsewhere.